Tuesday, September 24, 2013
This upcoming Saturday is my church’s women’s broadcast. I am so excited to be able to spend time eating a delicious dinner with wonderful women and then be spoken to by, what I am positive will be, some amazing speakers. Every year they ask for volunteers to set just one table for the dinner. There are multiple volunteers that decorate, and it’s so fun to see all the different kinds of table themes everybody comes up with. This year I decided to volunteer! It may have had something to do with the fact that I have had oodles of projects that I have wanted to do (I blame Pinterest), and this was the perfect excuse to do them.
The main craft that I wanted to try out was freezer paper stenciling. I’ve seen lots of people use this for baby onesies or decorative pillows and they turn out so cute! Since the theme for my table involved burlap and lace, my goal was to stencil some custom designs onto some of the leftover burlap I had.
For this craft you will need:
Freezer Paper
(I found mine by the canning supplies… who knew?)
Fabric of choice
(I chose burlap)
Exacto knife
Iron
Paint and paint brush
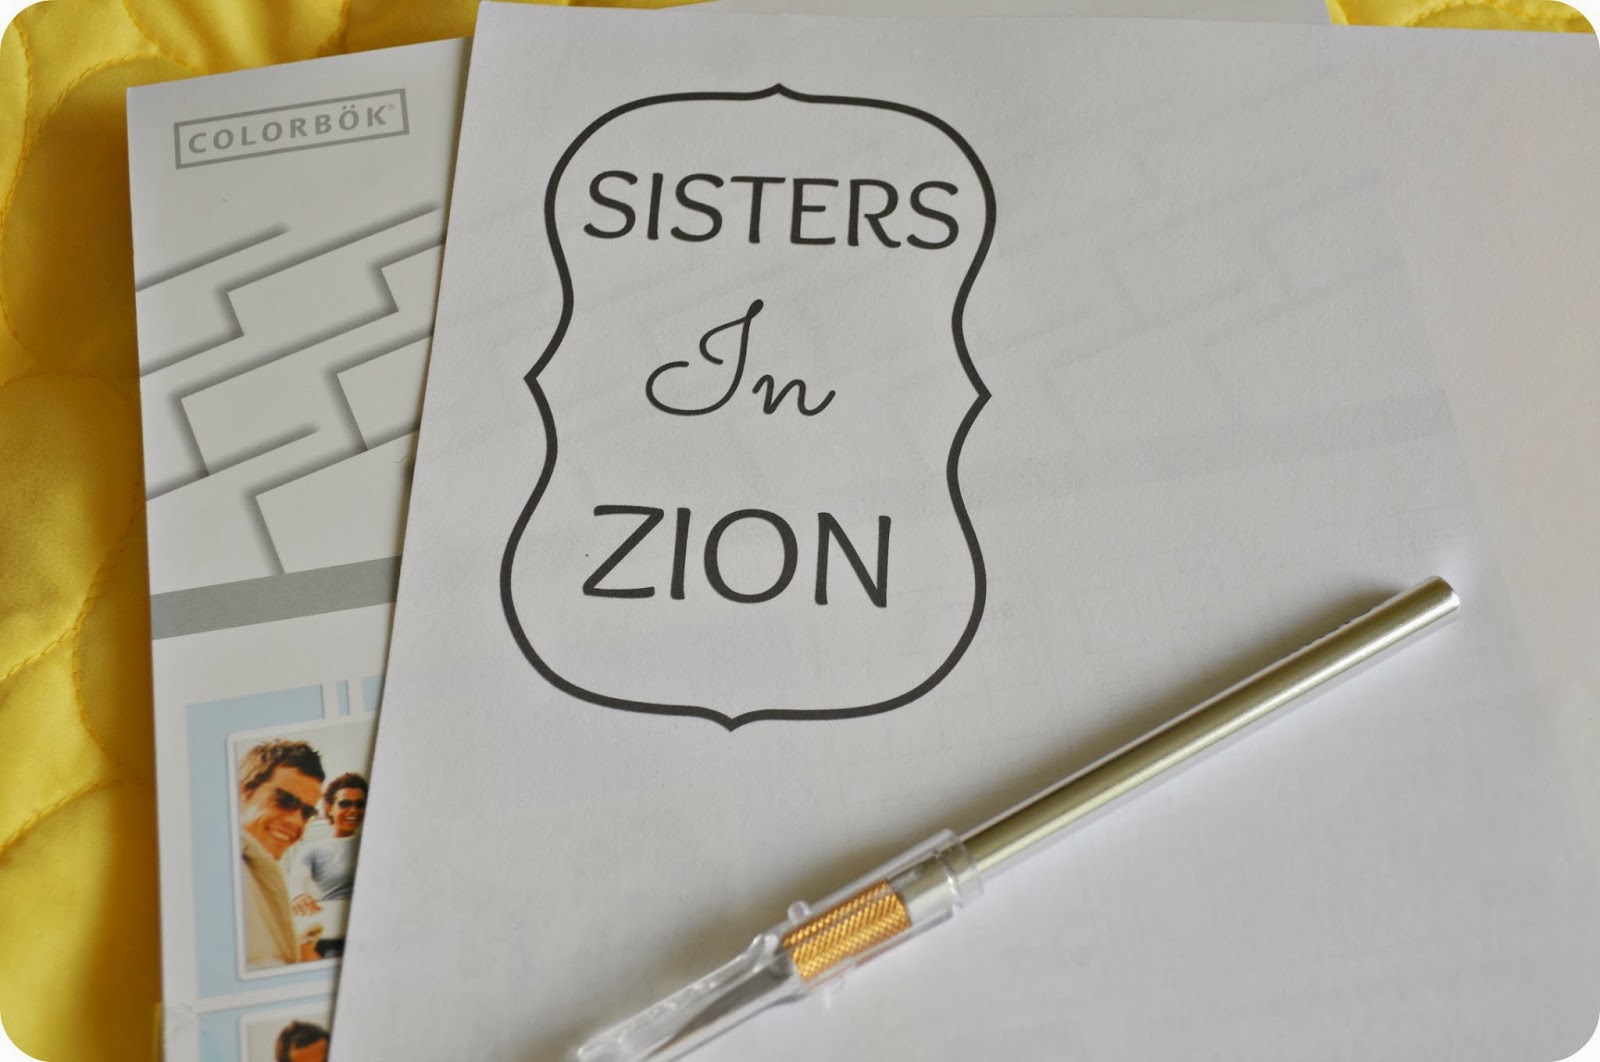
First, I designed an image in PicMonkey (my favorite photo editor).

I knew I was going to be cutting this out by hand and I wanted to keep it really simple and sweet.
Next, I cut a piece of freezer paper to 8.5 x 11 inches. I love that you can put freezer paper in the printer! Make sure that you have it facing the right way. You want it to print on the paper side, not the waxy side.
Ready for the cutting! All I had for a mat to go underneath was a stack of cardstock. Use whatever works!
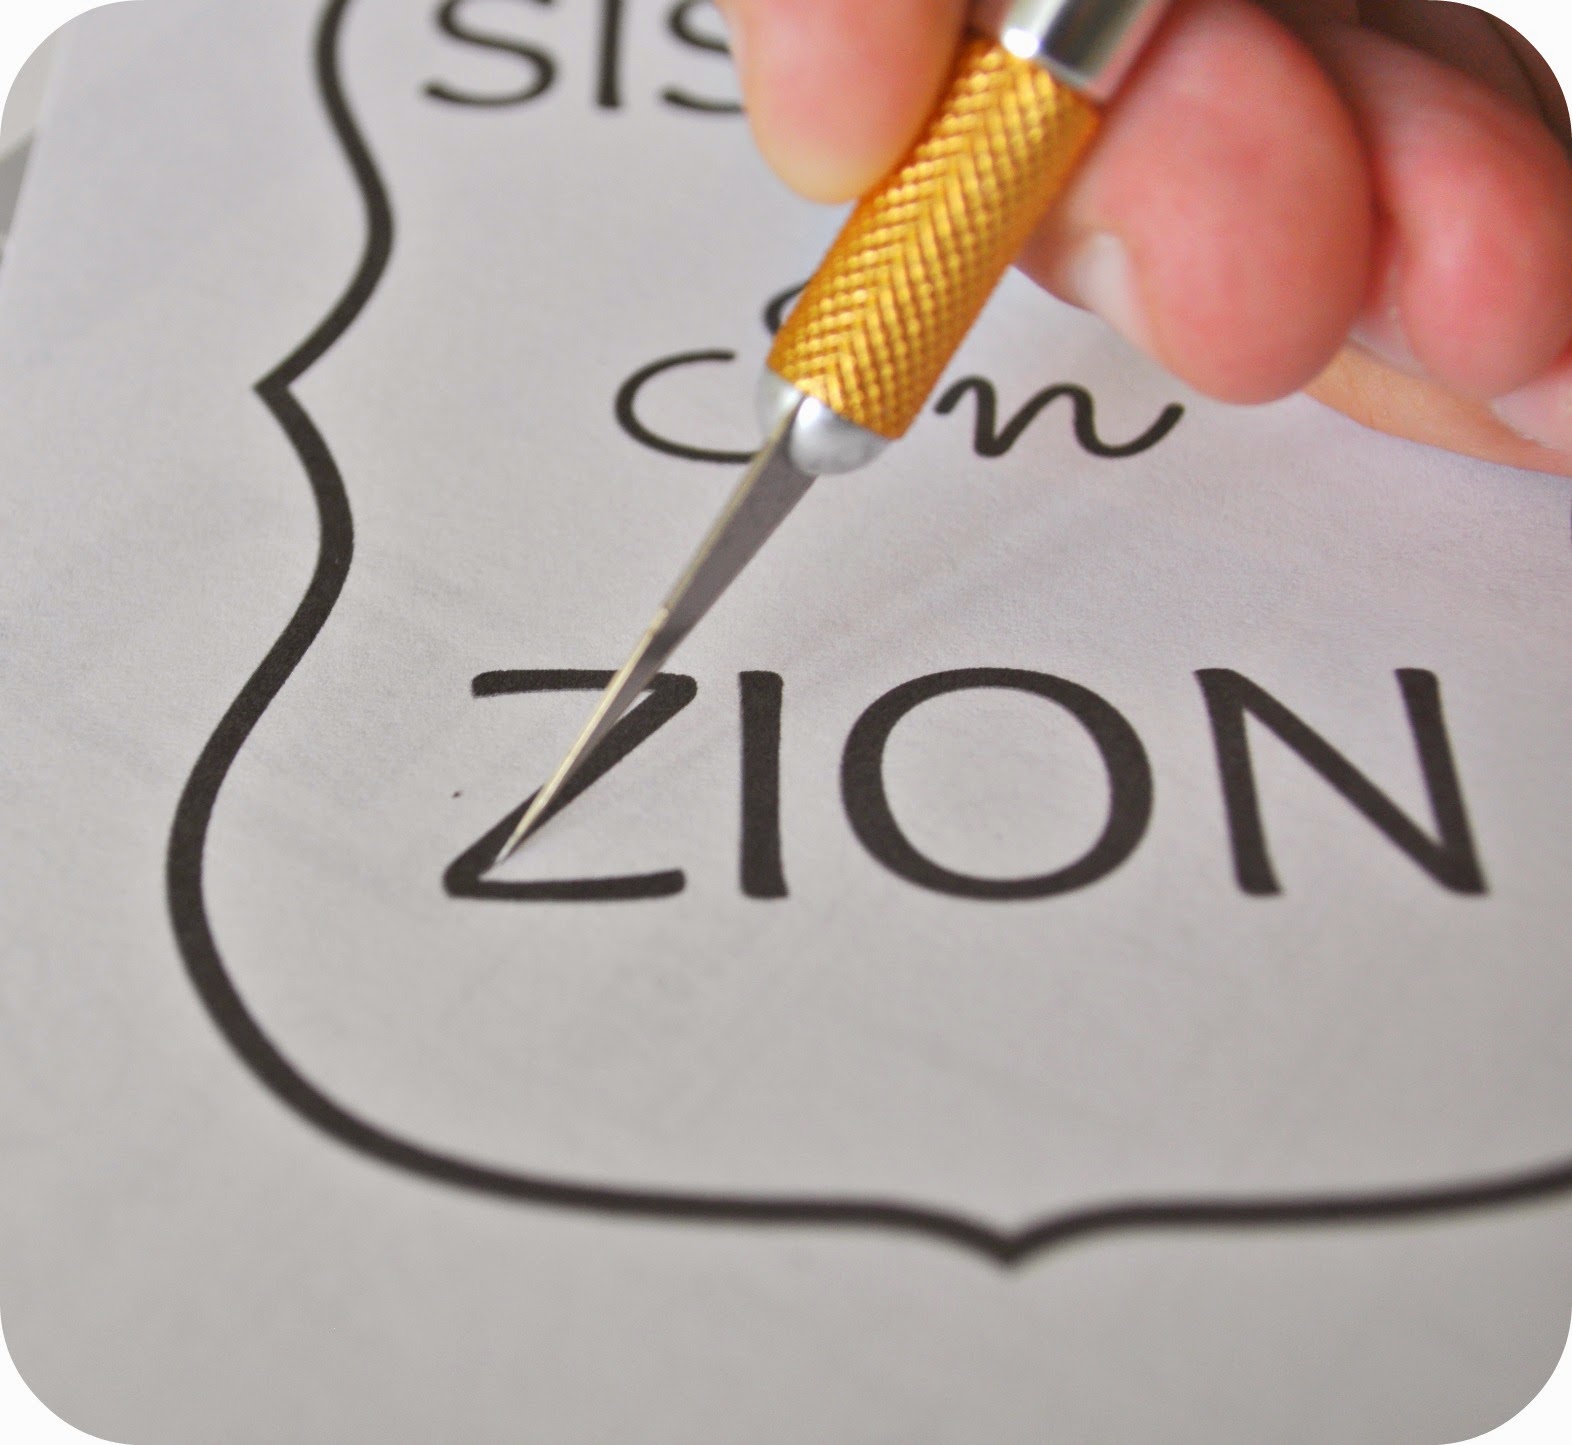
Cut along the outline of the letters.
It took me awhile to get used to using the Exacto knife, but after a while it got easier and a lot more fun!
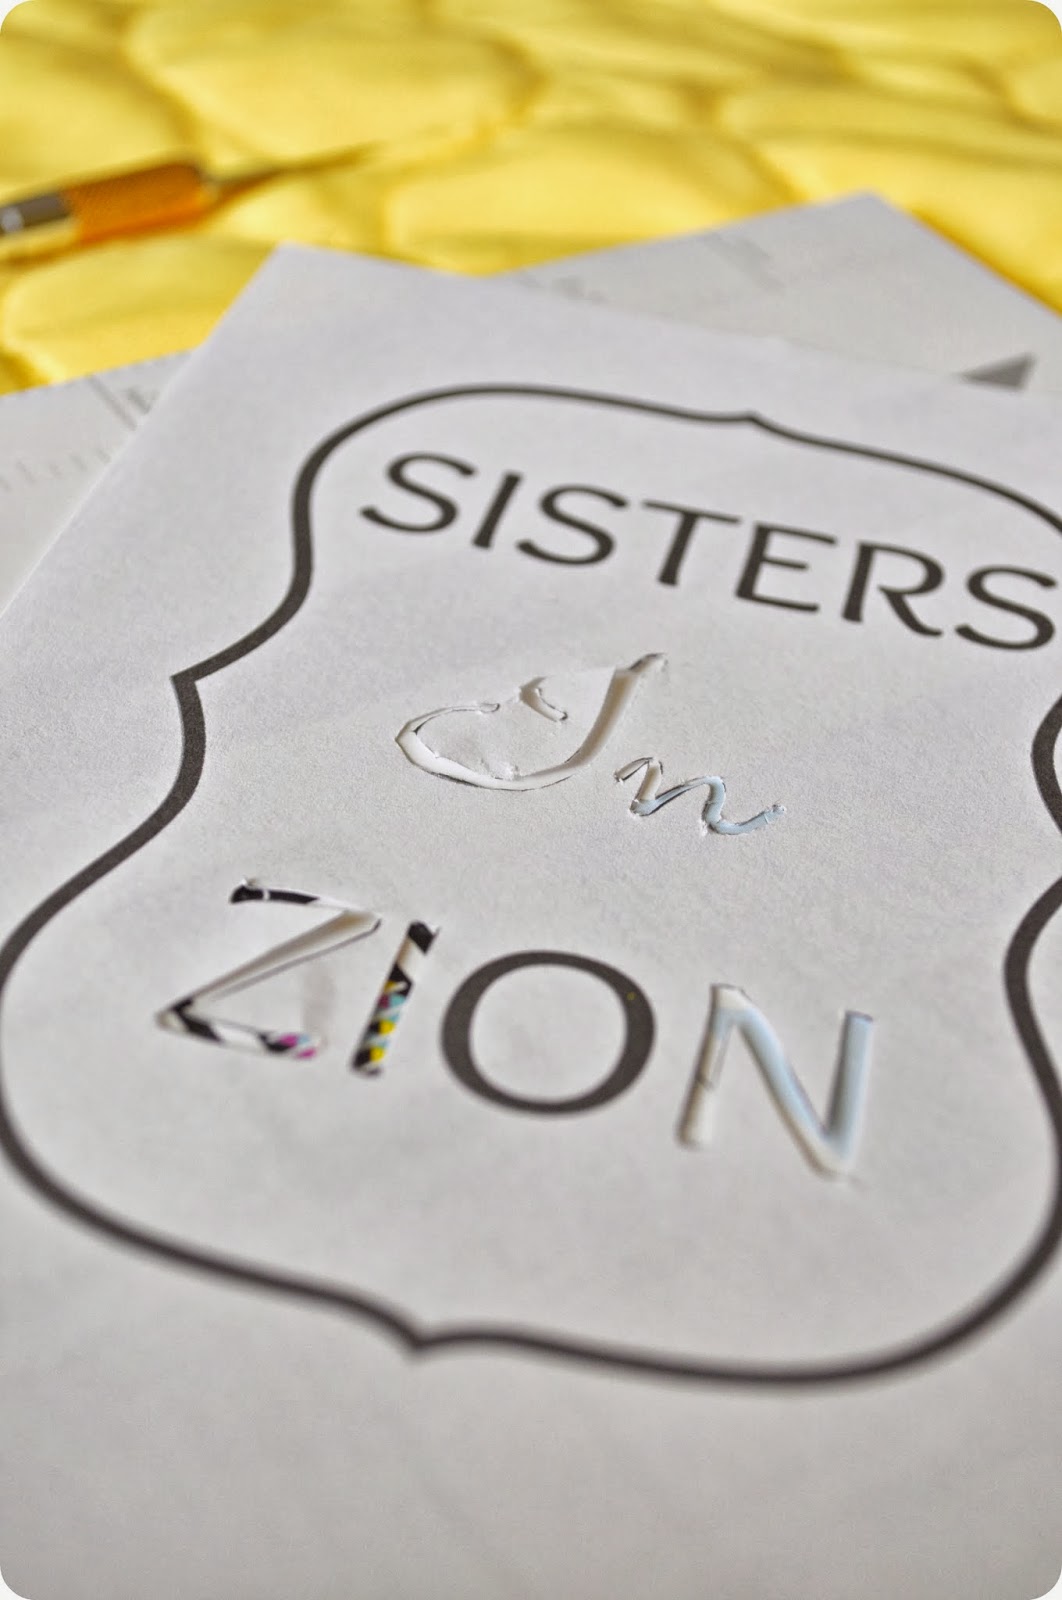
Next, I ironed on the cut out images to the burlap. I put my iron on the hottest setting and made sure the waxy side was on the fabric.
When you iron the freezer paper the waxy side adheres to the fabric and seals all the edges so no paint gets through. So cool! I only had to iron the paper for a couple of seconds before it adhered to the burlap.
I had three different cutouts for this image: one for the border, one for the words, and one for the inside of the O. I did these one at a time, just so I could place them more accurately.

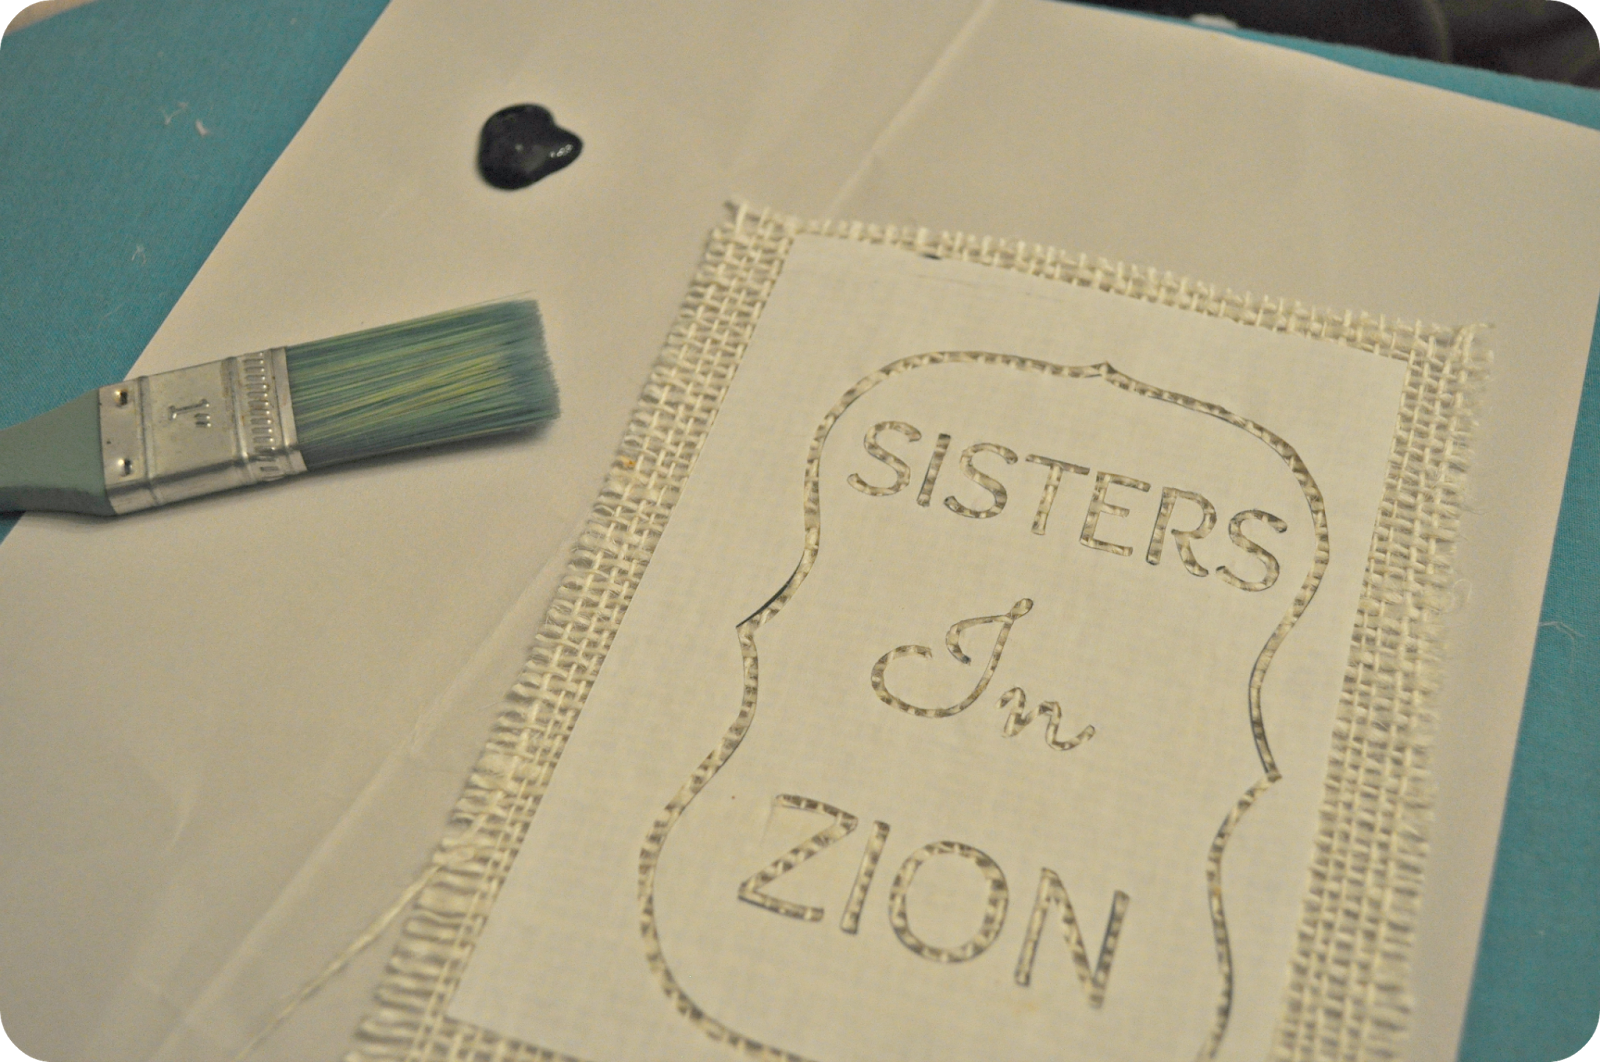
Ready to paint! Just paint in the open areas like so…
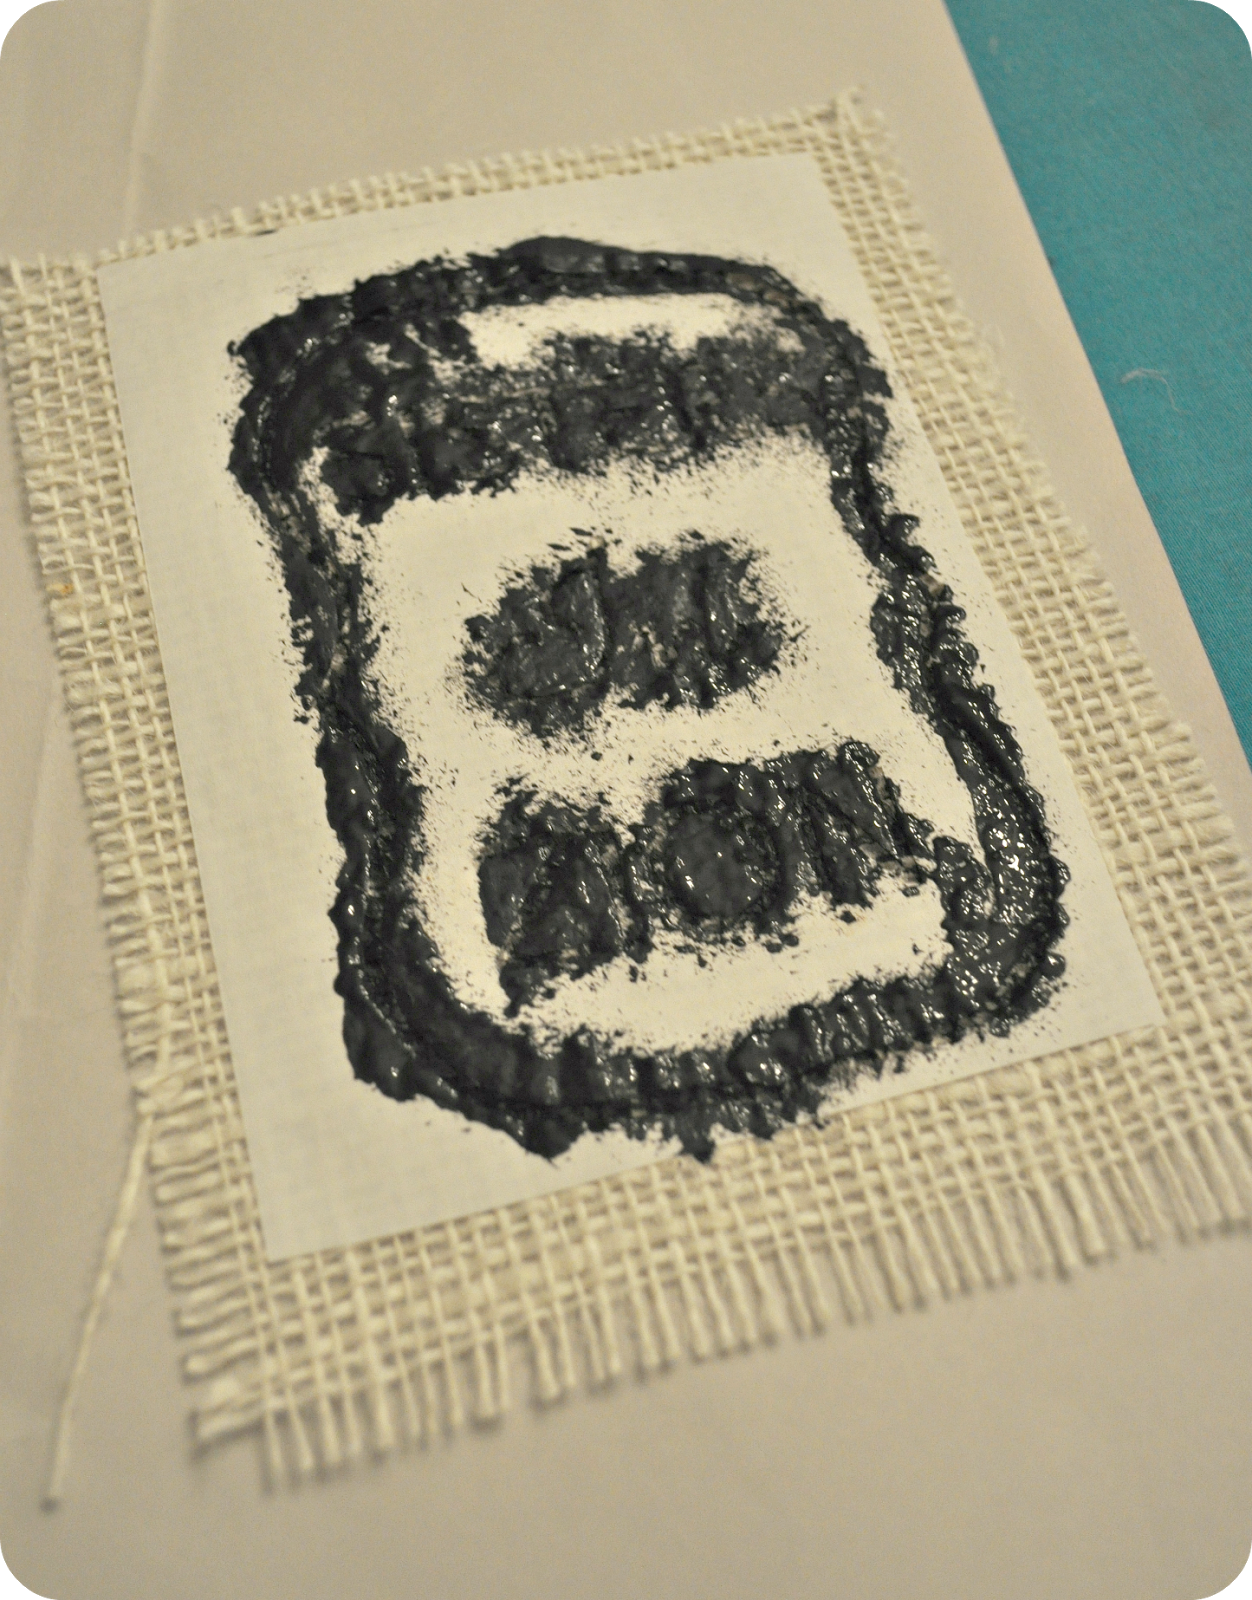
By this point I was so excited I didn’t even wait for it to dry all the way. After a couple of minutes I took it right off.
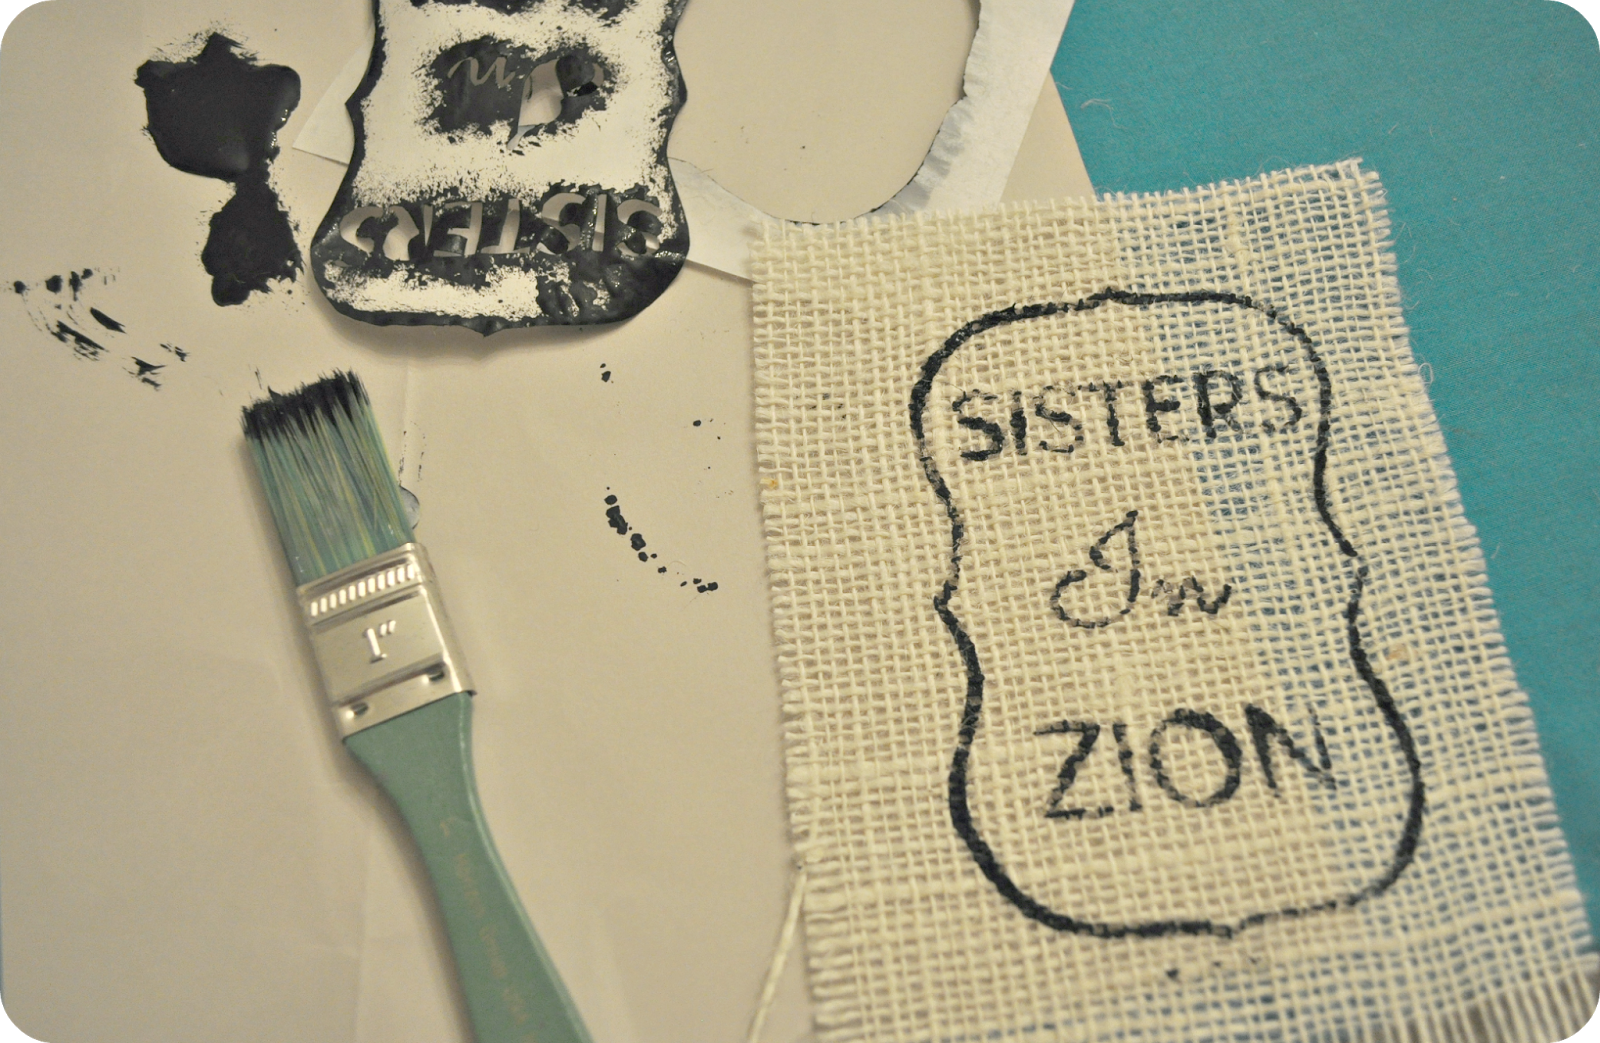
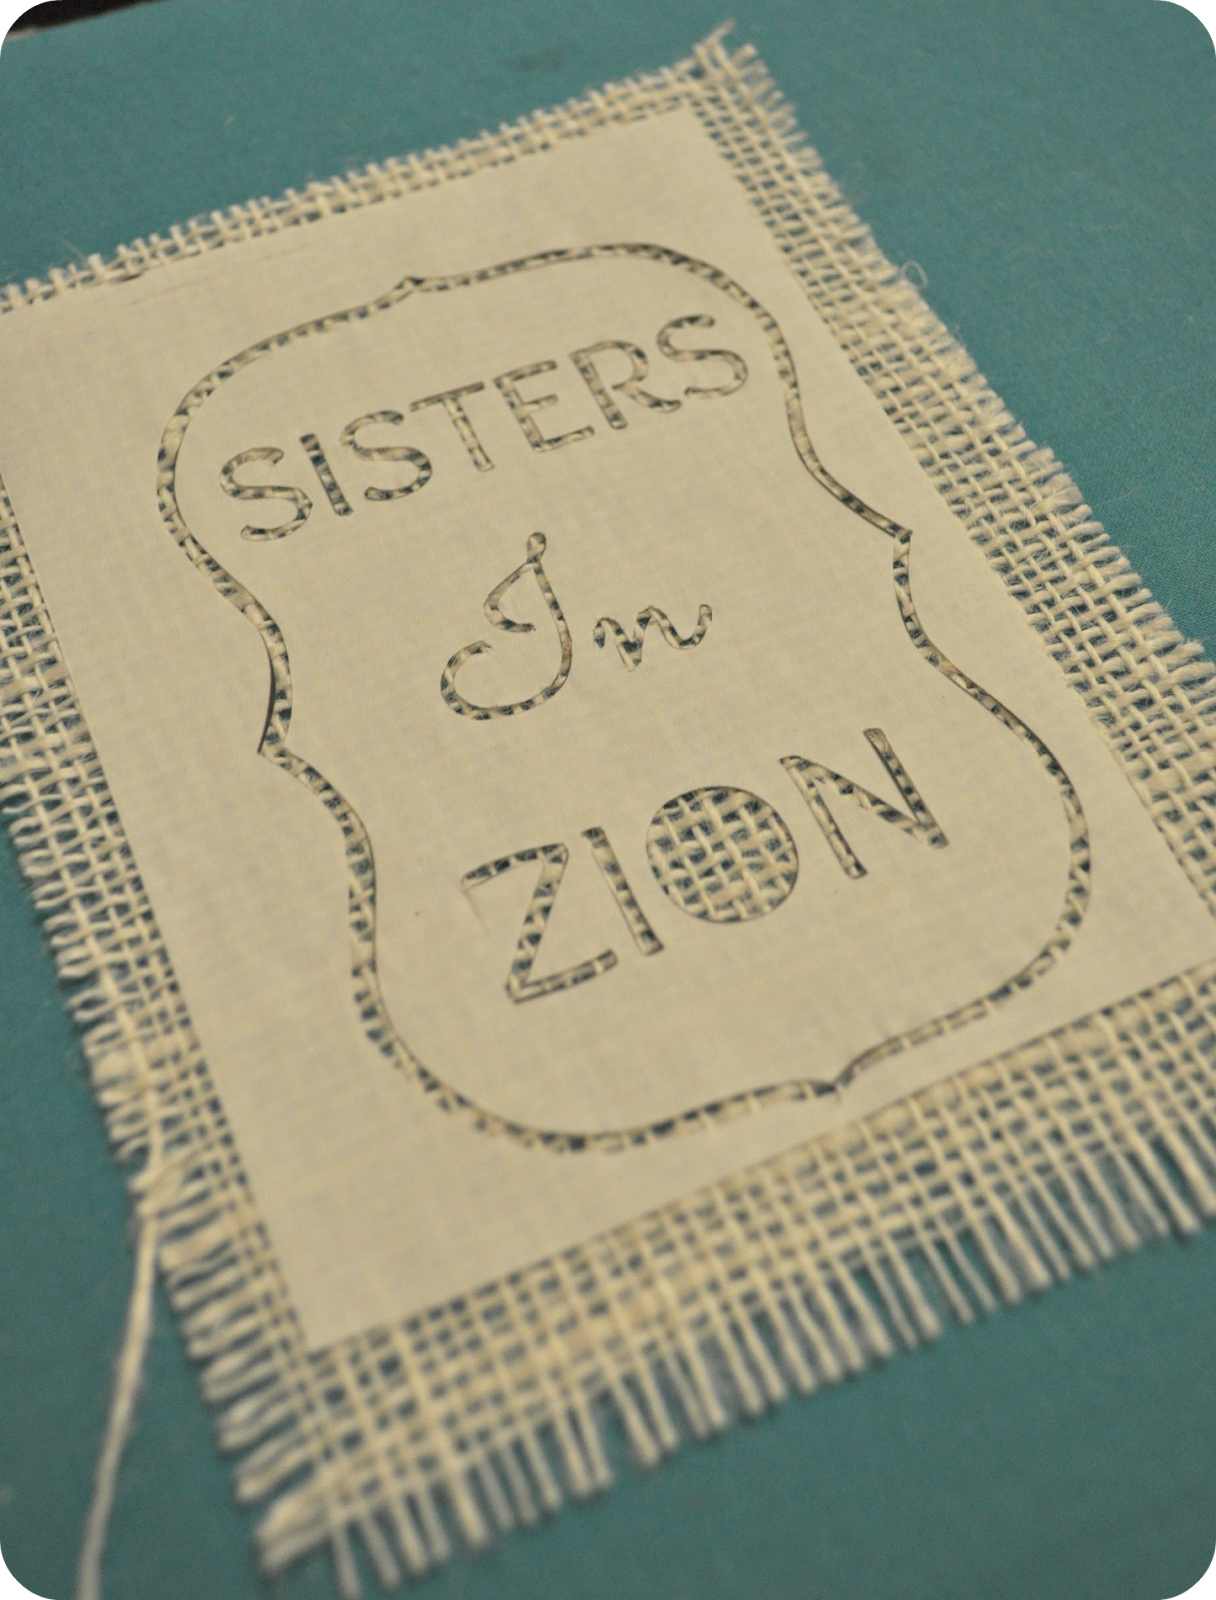
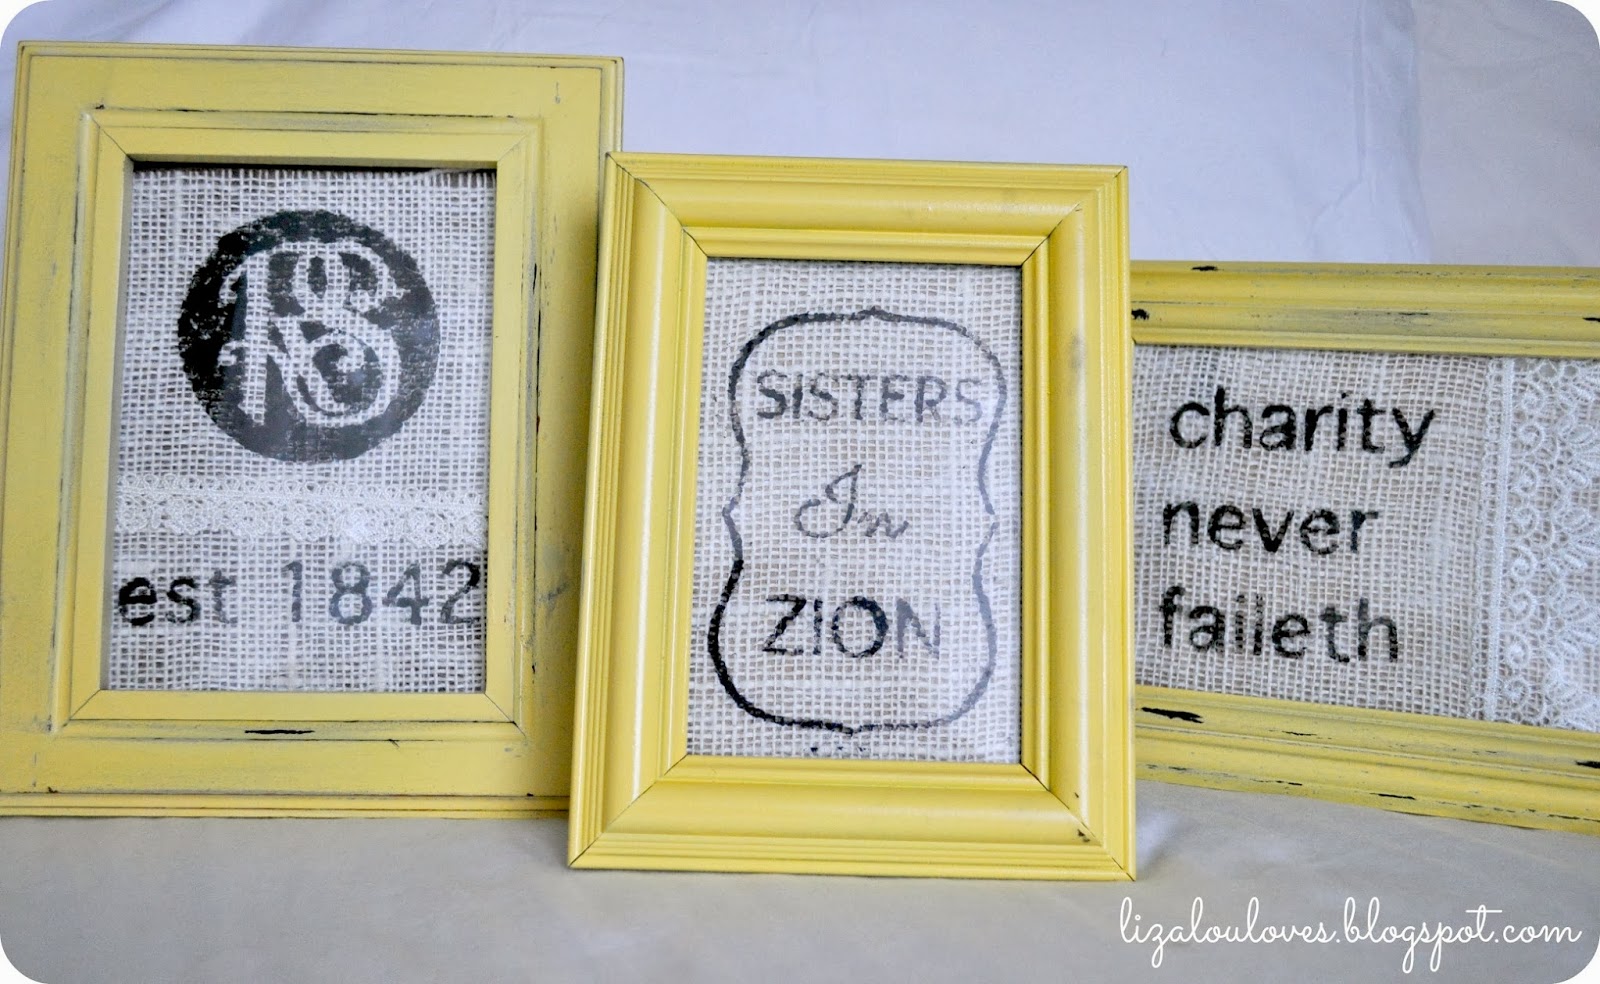
Oooh! I just loved how it turned out… so much so that I made two more to go with it.
I will definitely be trying stenciling again!
Happy Crafting!
Linked to:
Allie Bobe
September 25, 2013 at 8:22 PM
Thanks for stopping by! Love your ideas. Following you, hoping you’ll follow back 🙂
~Allie
Allie Bobe
September 25, 2013 at 8:23 PM
Thanks for stopping by! Love your ideas. Following you, hoping you’ll follow back 🙂
~Allie
LIZALOU
September 26, 2013 at 7:16 PM
I am your newest follower Allie! Thanks for visiting my blog!